Tape digitization has two huge benefits.
There are vast amounts of recordings out there that in some cases are musical or historical treasure troves. Labels that go back beyond 30 years or so usually have material that is just begging to be either re-mastered for streaming or fully remixed and re-released for commercial release. Is the time right for a 90s revival? If so, the recordings are most likely on tape in a storage room.
Lots of musicians also have old recordings that could be digitized. These could be demos that could be finished, or full masters and historic recordings that could be re-released.
Digitizing magnetic tapes: the quick guide for better results
There are many reasons you might want to digitize and/or restore magnetic tapes:
* To make your music assets available in a digital format (Spotify, advertising etc)
* The need to be able to mix or otherwise re-use them (if a revival happens, it’s important to be able to act quickly)
* The need to properly archive them
* The need to preserve the recordings in a format that is less fragile than magnetic tape.
This guide provides you with an overview of how to digitize magnetic tapes to ensure the best sound quality and longevity. Much more could be said about the restoration of damaged tapes, but to keep things short, we’re taking the most frequent case of tapes that are still in relatively good condition.
1. Assess the Tape Condition: Before starting the digitization process, take a good look at each tape. Look for physical damage. Mould, dirt, or sticky residues can affect playback and sound quality. Additionally, check for any signs of degradation, such as oxide shedding or print-through (when the signal of one layer of tape affects another).
2. Clean the Tapes: Cleaning the magnetic tape is a critical step to remove dirt, debris, and contaminants. Use a specialized cleaning solution and a lint-free cloth to gently wipe the tape surface. Ensure that you don’t damage the tape or erase any data when you do this.
3. Prepare the tapes: Most of the time, older tapes suffer from some degree of “sticky shed syndrome”, when the recorded surface risks being scraped off the tape when you play it. “Baking” is a technique used in tape restoration to address this. The affected tapes are placed in a temperature-controlled oven, typically around 50-55°C, for a specific duration. The heat stabilizes the tape’s binder, temporarily allowing proper playback and transfer of the data stored on the tape surface. It is best to immediately transfer the data and use the source tape as little as possible after that.
4. Digital Transfer: To fully restore magnetic tapes, we recommend that you transfer the audio content to a digital format. Connect the tape deck to a high-quality audio interface or converter and use professional-grade software to capture the audio in a lossless format such as WAV or FLAC. Ensure proper calibration and adjustment of recording levels to achieve accurate reproduction. Proceed with care, as some tapes can only be played once.
5. Noise Reduction: One common issue with older magnetic tapes is the presence of background noise, hiss, or hum. Use noise reduction tools, such as spectral editing or adaptive filtering, to minimize unwanted noise while preserving the original audio quality. You might have to adjust the settings to avoid artifacts or loss of high-frequency detail.
6. Equalization and Dynamic Range Control: During the digitization process, equalization can help correct any frequency imbalances or tonal inconsistencies in the source audio. Use parametric equalizers to adjust frequencies selectively and enhance the overall tonal balance. Dynamic range control techniques like compression or expansion can be applied to manage excessive dynamics.
7. Deal with Dropouts and Errors: Magnetic tapes sometimes suffer from dropouts or errors that result in gaps or glitches in the audio. Use specialized software to repair these issues, employing techniques such as interpolation or error concealment. Manual restoration may be required for more severe errors. This could require meticulous editing and audio reconstruction and might best be left to a specialist.
8. Metadata and Documentation: As part of the digitization, don’t forget to document all the relevant metadata associated with the tapes. This includes information about the recording, such as artist, date, and location, as well as details about any restoration techniques applied. Properly documenting the restoration process aids in future reference and helps maintain the integrity of the recordings. Remember that historians might be interested in the names of the original players and engineers. If you have that information, this is a great time to centralize it.
9. Storage and Preservation: Once the restoration is complete, make sure that the tapes go back into proper storage and preservation. Store them in a cool, dry environment away from direct sunlight and extreme temperature fluctuations. You might also want to make backups of the restored audio files to prevent loss due to hardware failure or accidental damage.
Digitizing digital tapes is a meticulous process that requires careful attention to detail and the use of specialized tools and techniques. By following this comprehensive guide, music enthusiasts and professionals can preserve and revive music recordings, ensuring their longevity. Some can even be successfully re-mixed and re-issued.
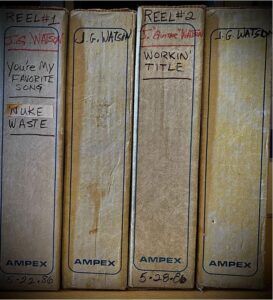
3 Hats Music has digitized a number of historic recordings, including ones by Johnny Guitar Watson, Rufus Thomas and others. To see what we could do for your recordings, get in touch.
What can you realistically recover and restore?
We have worked with quite a range of formats by now, from professional 24-track recordings from the 80s to cassette tapes and Betamax. It might seem obvious, but what you need is a clean source and a well-maintained player.
Audio tape digitization

- 2” 24-track tape reels
- ½” 16-track tape reels
- ½” 2-track tape reels
- ¼” 8-track
- ¼” 2-track
- PCM 201es / Betamax digital tapes
- Music cassettes
- Mini-disc (MD)
- Vinyl
Video tape digitization
- DV tapes
- Umatic
- Betacam
- VHS
- SVHS
- Betamax
- HI8
- Mini DVD
- Tape baking / Sound restoration
Output as digital files in the resolution and sample rate of your choice and/or on digital media such as hard disk, SSD, USB stick, CD or DVD. We can also record back onto your original tape format – such as 24-track – if you want to to preserve the analogue chain.
What does tape digitization cost?
From our perspective, the cost per tape depends on three things:
- the physical condition of the tape
- the quantity of tape being restored
- the cost of the output media (external hard disk, tape, etc)
If more than one tape is being transferred, they can be baked at the same time to reduce the energy costs. As an indication, baking a single 24-track on its own can cost upwards of €70. Transfer and digitization then takes a few hours of studio time, based on the nature of the recordings and what sort of output is required.
Our offices are based in Brussels. Contact us now about the best way to start working on your tapes.